Creating Engaging Classroom Podcasts With Canva: A Step-by-Step Guide
Over the last few years, Canva has become one of the go-to resources for teachers across the globe to work with their students. Its robust features and easy to use interface have made it the obvious choice for many when making infographics and designing posters, and even more recently their word processor has been gaining steam. Last year, I even shared some tips on using it to make classroom comics.
Today, we’re going to step things up a bit and use Canva to make podcasts in the classroom. Helping students build their speaking skills through podcasting has been a passion of mine for years, but I’ve always struggled with finding a good platform to record on. That struggle is now over. Using Canva to record and edit podcasts is the easiest way to get students talking, and you can work on it in stages, as I lay out below.
Whether you’re looking to do simple spoken projects to practice pronunciation or full-length audio productions to refine fluency, Canva’s got you covered. You can use this as a fun way to engage students in pretty much any language learning class, so let’s take a look at how to do it!
Step 1: Initiating the Project
- Launch Canva: Begin by opening Canva. If you have a school account, great! But if not, you can work with the free version with no problems.
- Choosing a Template: Direct your students to select an appropriate template. A good starting point is searching for “Podcast Covers”; this category offers templates with a professional base for their project.
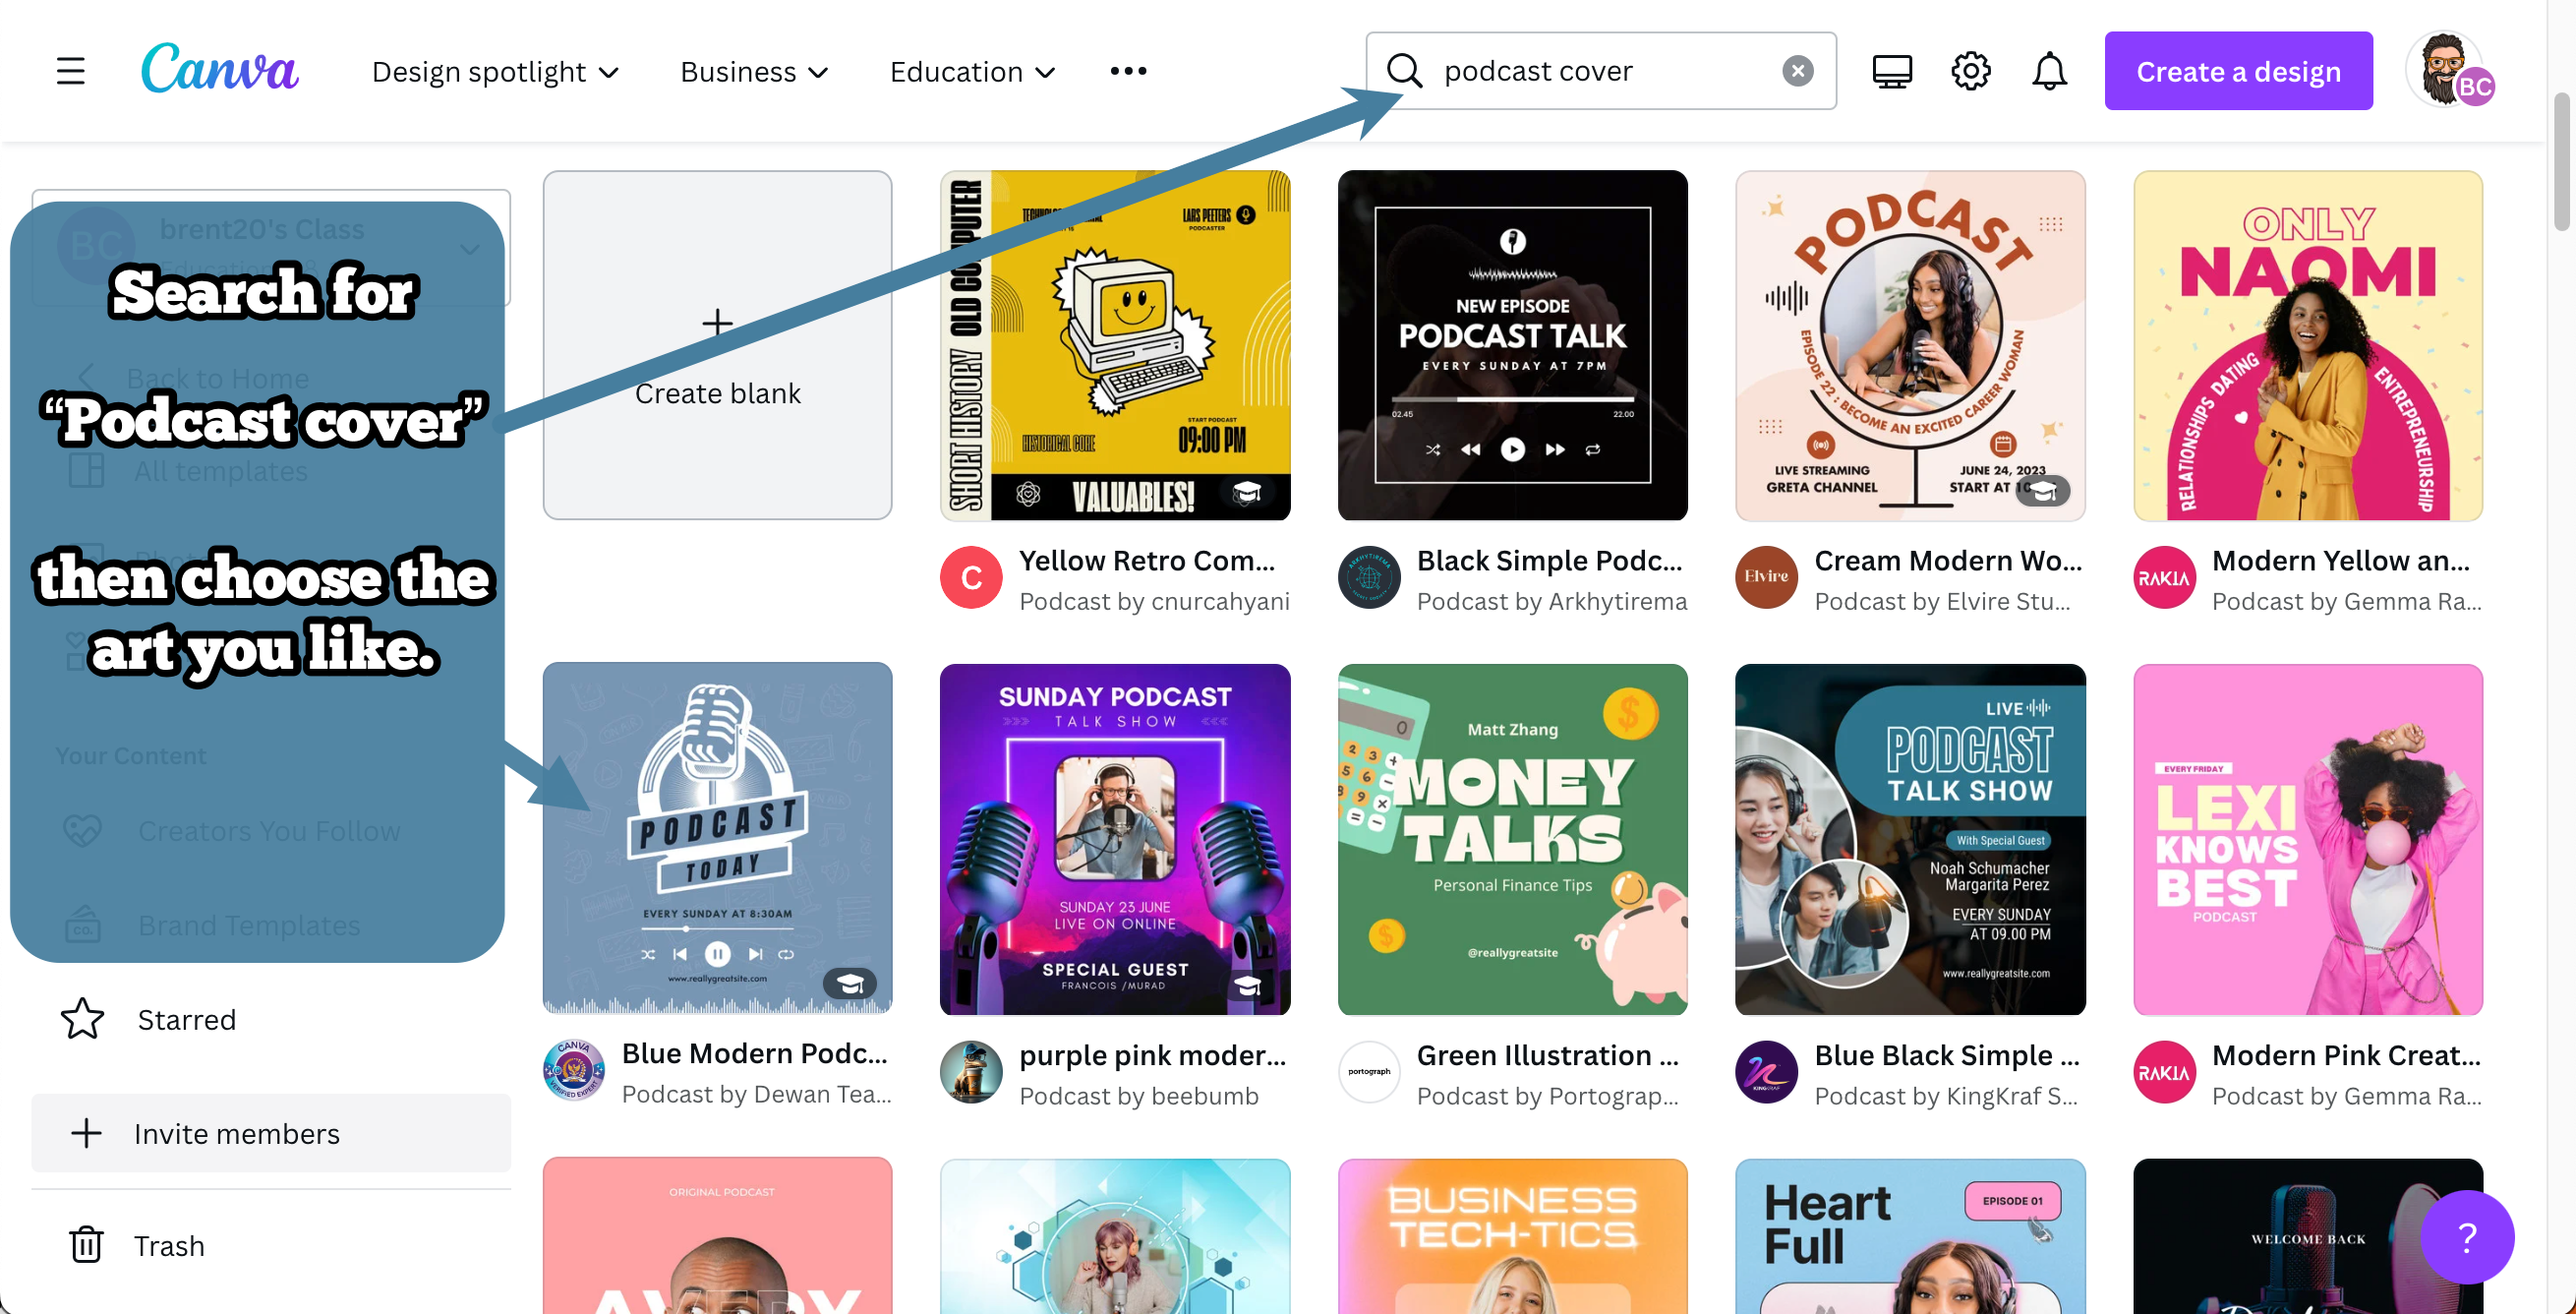
- Customizing the Artwork: Once students find the artwork they like, encourage them to express their creativity by personalizing the selected template, which will serve as the visual face of their podcast.
Step 2: Recording Phase 1 - The Basics
- Preparing to Record: Guide your students to the “uploads” section in the left toolbar, where they will find the “Record Yourself” option. This will take them into the “Studio” to get started. Note that they may have to click on some permissions boxes to allow recording.
- Setting Up the Recording: The default setting is video recording, but this can be easily switched to audio-only by going to the “Camera” box and selecting the “No Camera” option.
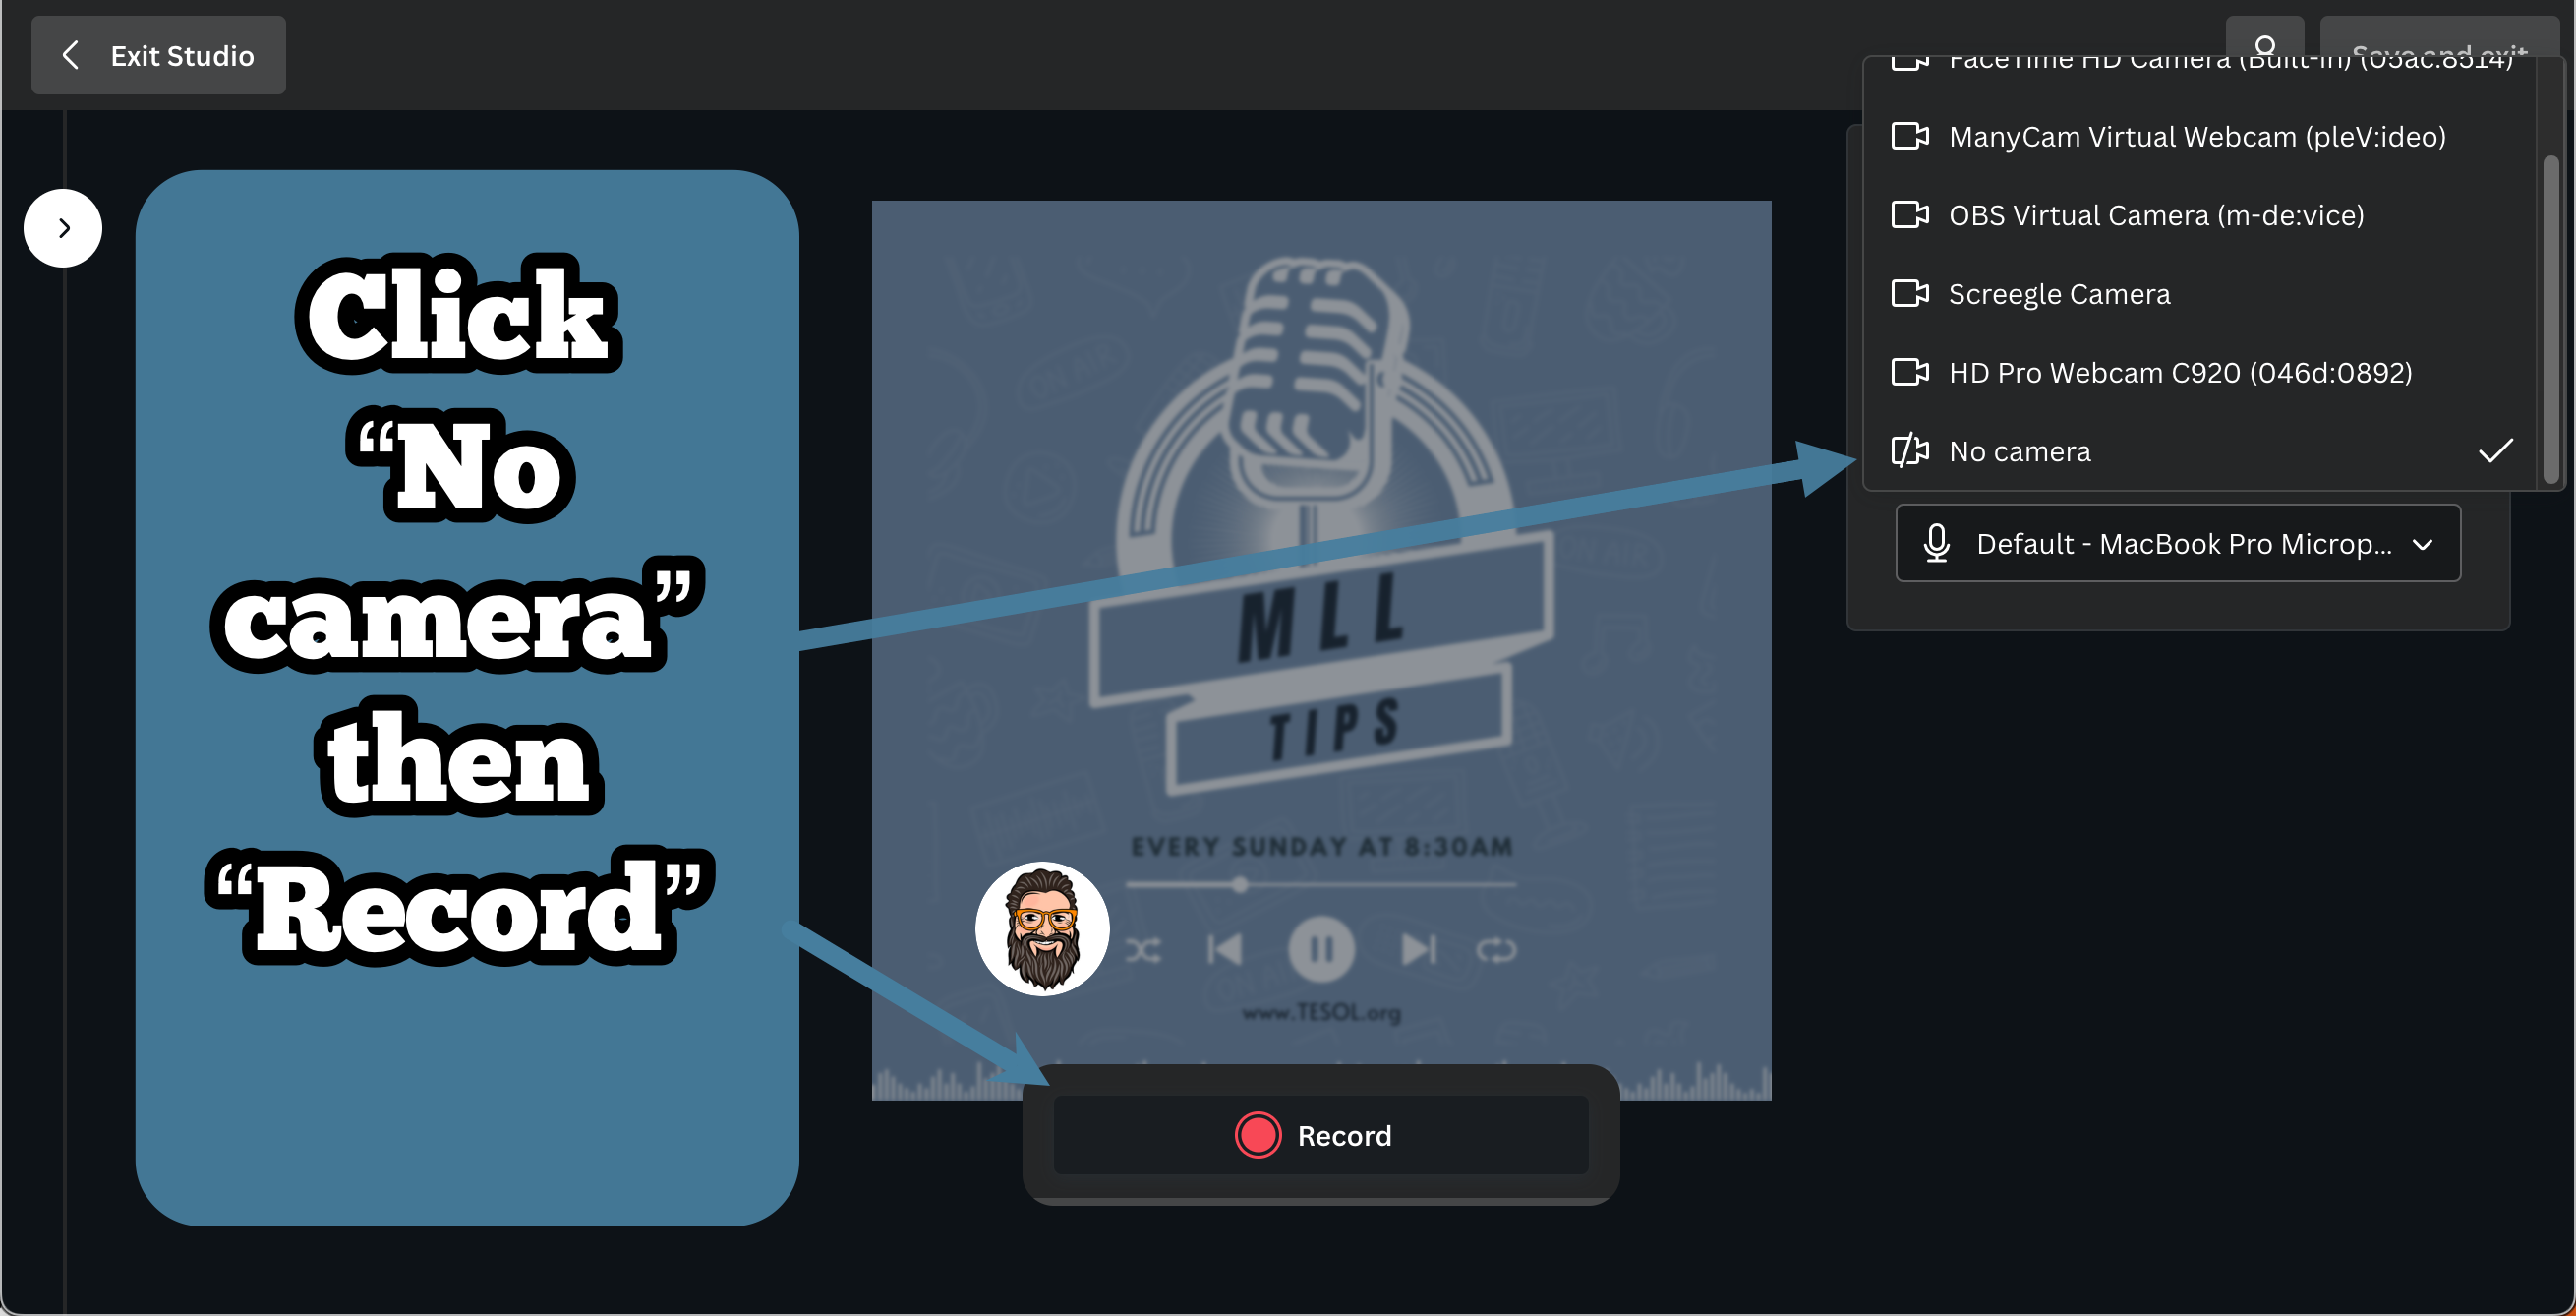
- Beginning the Recording: Once ready, students can start their recording journey with a click of the “record” button, followed by a clear 3-second countdown timer. Once that timer counts down, students start talking!
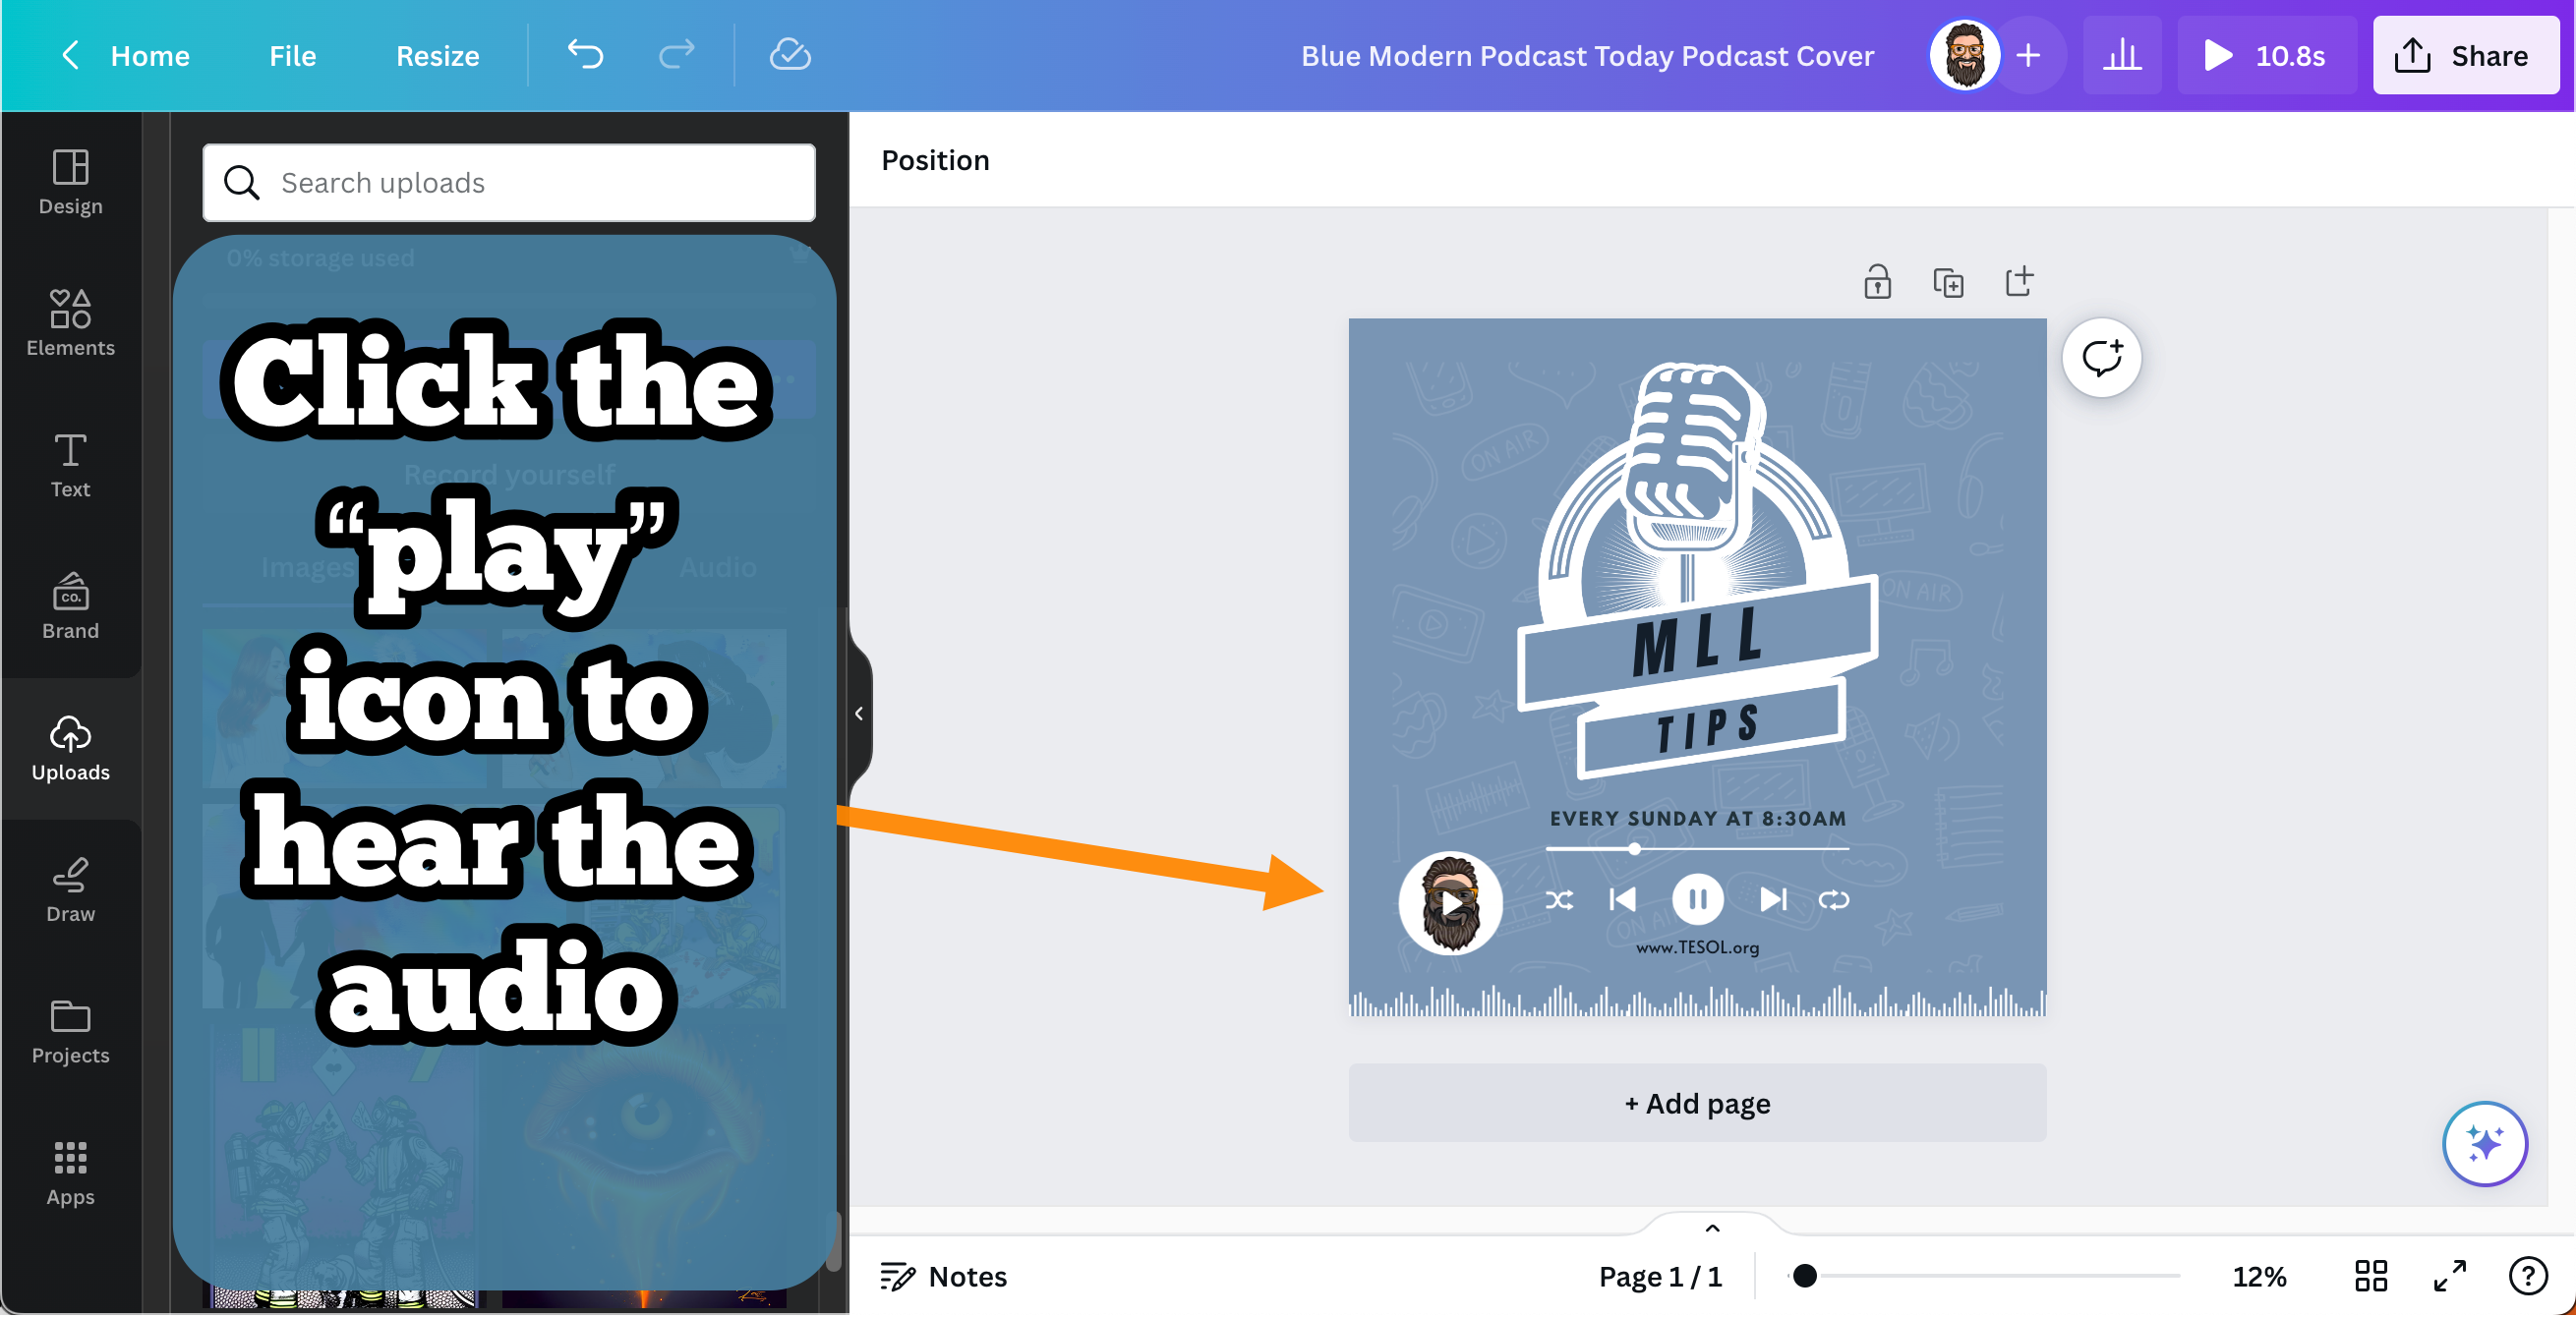
- Save and Exit: After students have finished recording, they can click on the “Save and Exit” button in the top right corner. It will bring them back to their canvas page, where they can click on their avatar/name icon to hear the audio.
Depending on the project requirements, students may choose to record in a single take or go for a segmented approach for a more structured output. If a quick recording is all you want, or if your students need time to build on the tech, you can go straight to Step 5. If they’re ready to push their game up a bit, move on to Step 3!
Step 3: Recording Phase 2 - Developing a Structured Narrative
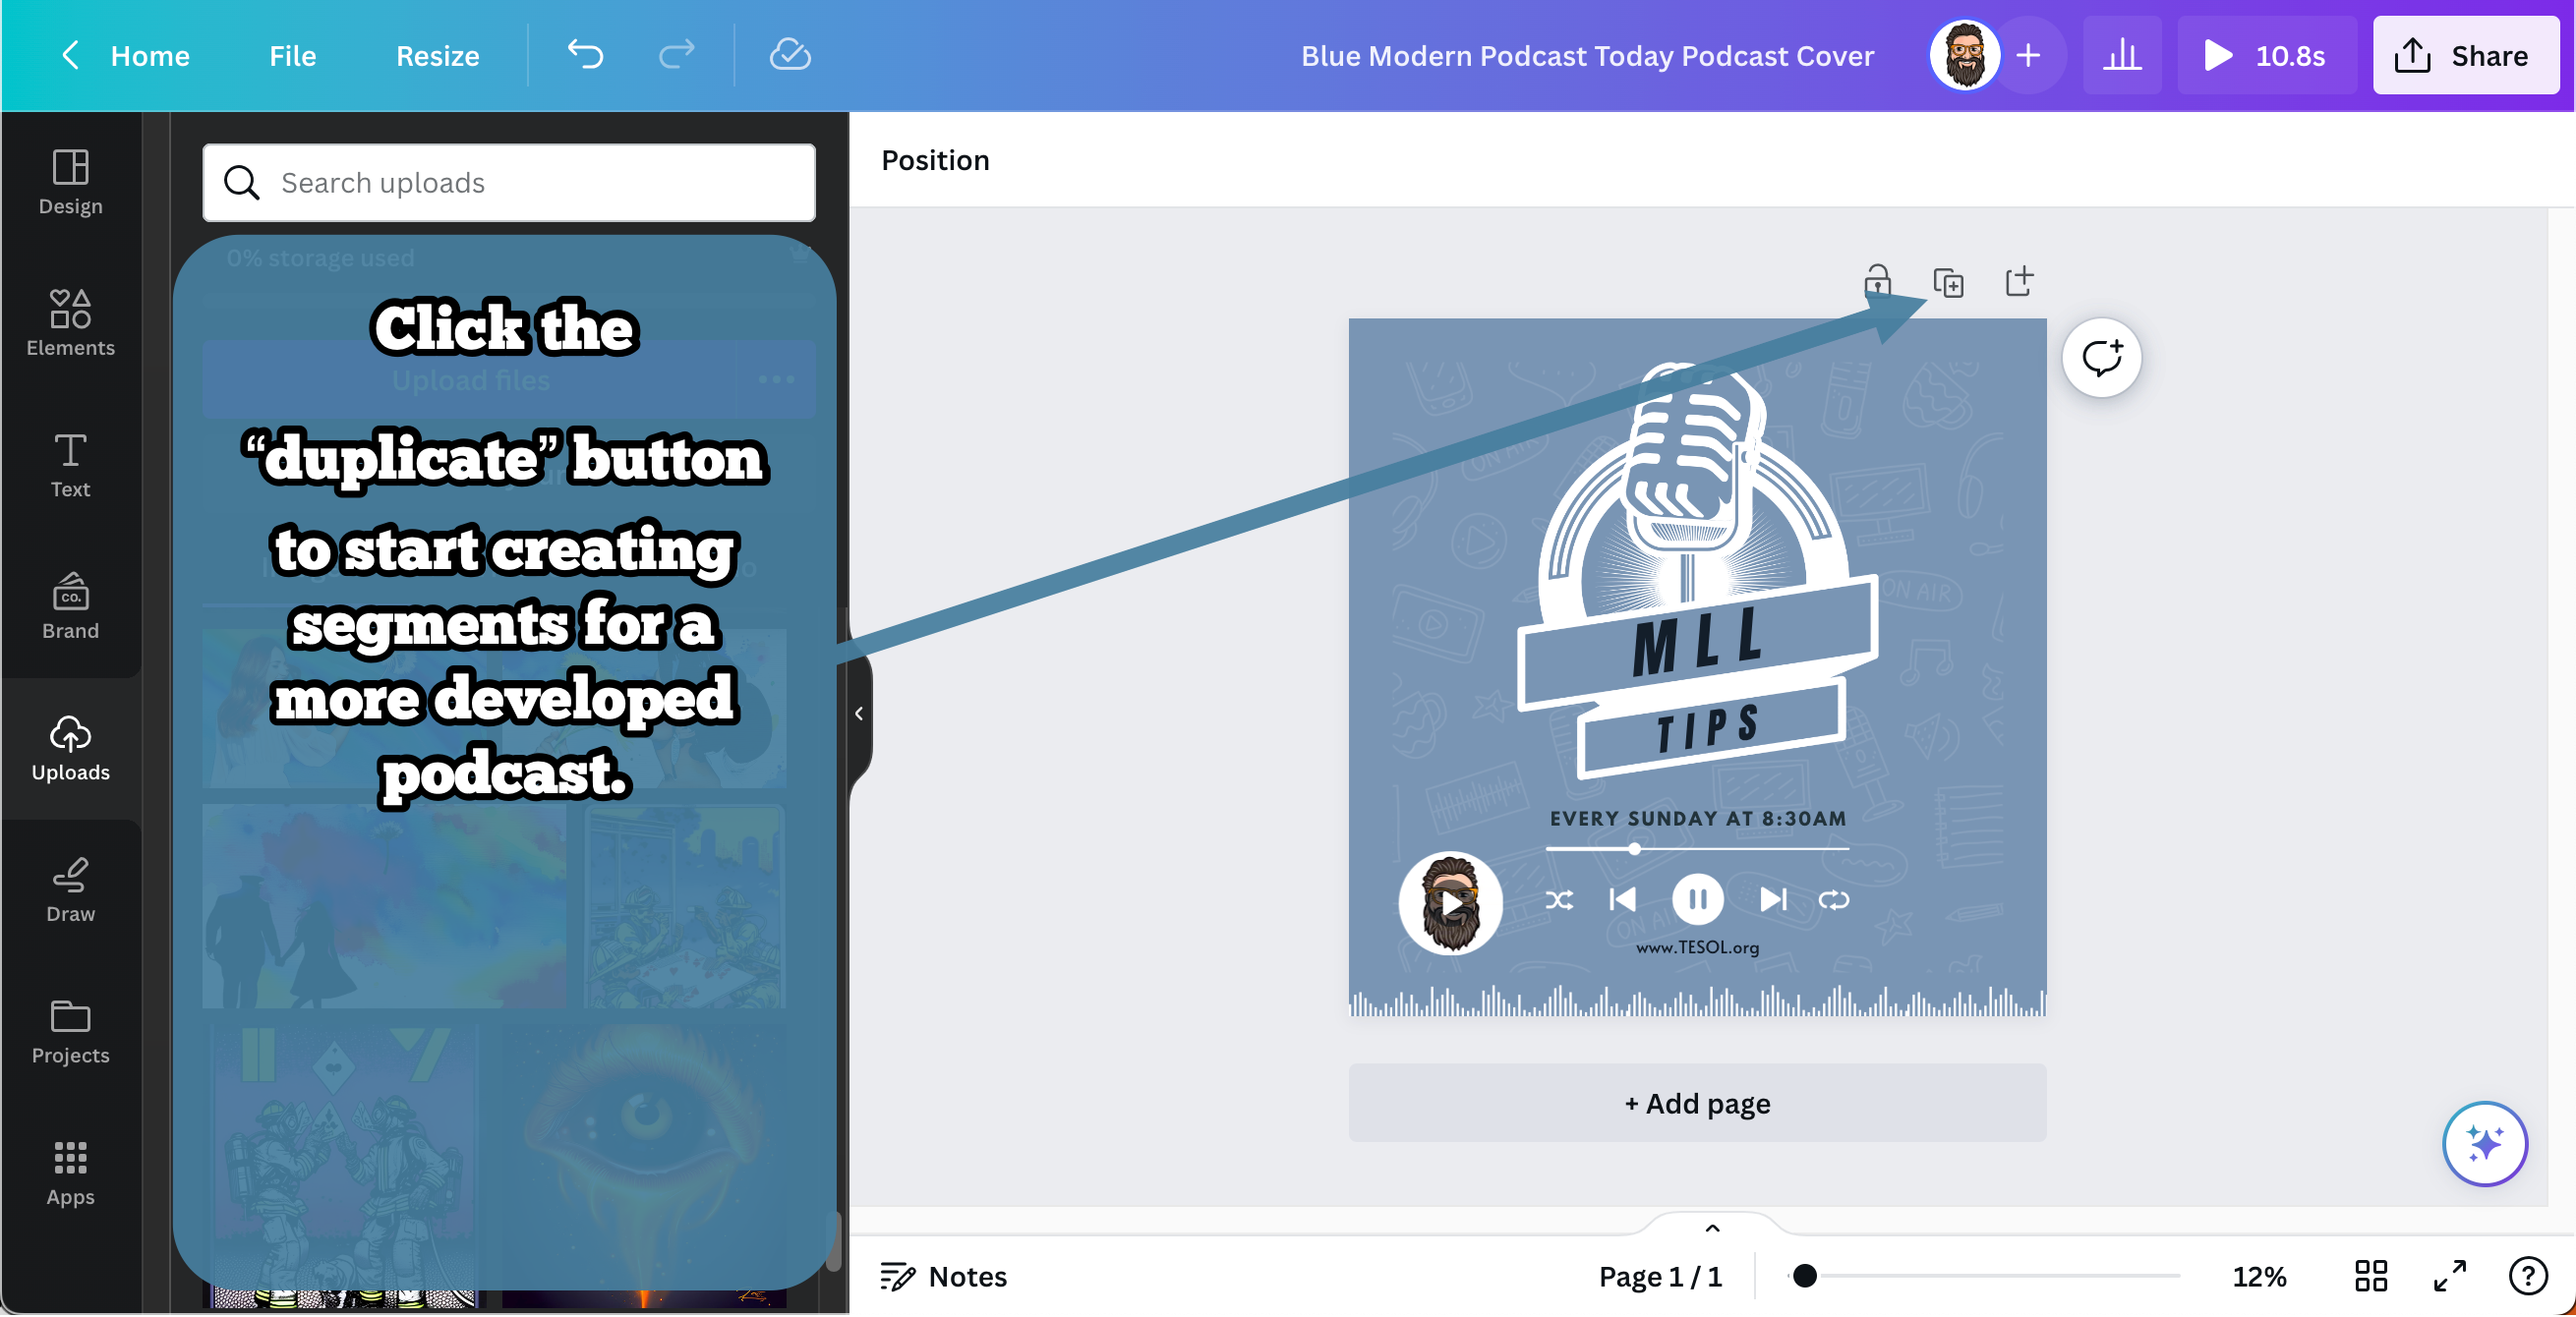
- Creating Segments: For a detailed and segmented podcast, students can create multiple sections that will automatically combine to form a clear narrative. For each segment, students should click the “duplicate” button, which preserves the visual theme across sections. Students will find their recording connected to their avatar or account icon. Every time they duplicate, they should delete the recording on the new page (duplicate brings everything across), then begin the recording process again as above.
-
- Note that the “Add page” button also works, but will not bring along the podcast art.
-
- Segment Mastery: Encourage students to perfect each segment without the burden of getting it right in a single take, promoting a stress-free and focused recording environment.
- Guided Structuring: Suggesting a time restriction per segment (1 minute, for example) can aid in maintaining a clear and concise narrative, facilitating a focused and engaging content creation process.
This may be your stopping point, depending on how comfortable the students are with the tech. If you’re happy with the longer form recordings as they are, skip ahead to Step 5! If you really want them to go for a professional sound, let’s move on to Step 4.
Step 4: Elevating the Project With Effects and Editing
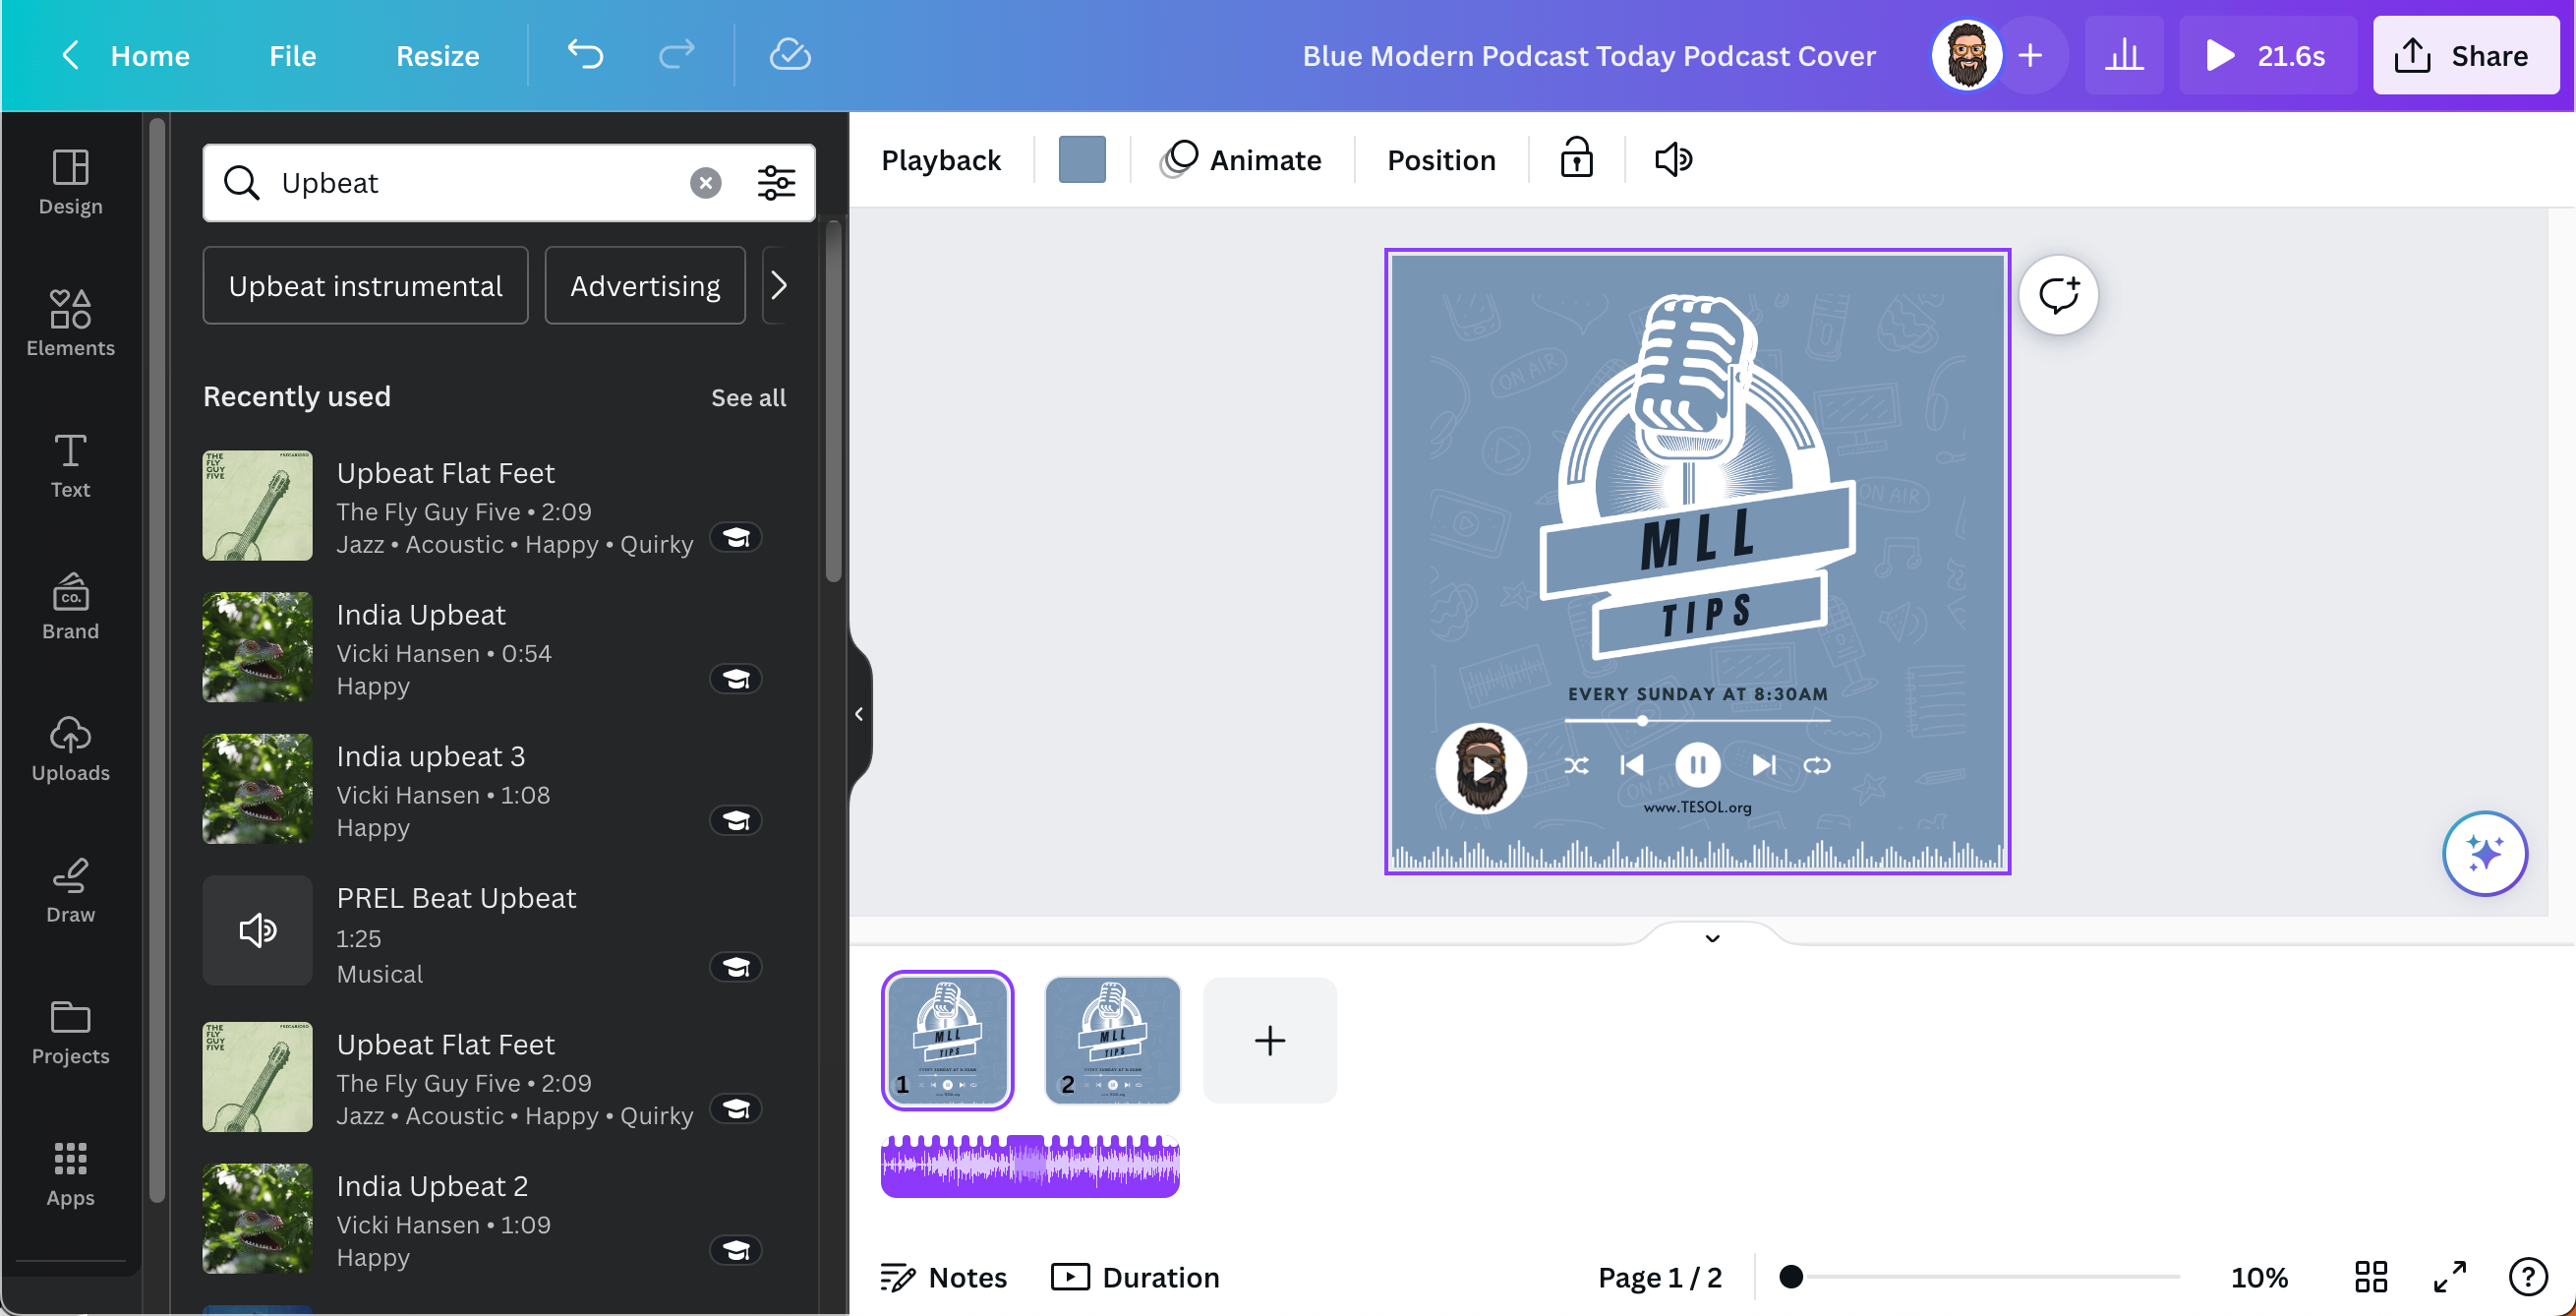
- Adding Audio Enhancements: Students seeking to further enhance their project can be guided to the “Apps” section where they can search for “Audio” to find thematic music and sound effects that complement their narrative tone. When they click the music they like, it will make an editing bar that they can work with to go for professional level audio.
- Integrating Transitions: For a real professional feeling, guide students to incorporate transitions for a smooth flow between different segments, adding a professional touch to their podcast. This is done in the same way as above: click “Apps” then “Audio”, then search for “Transitions”. Students can drag the transitions down into the editing bar at the bottom and position it where they think is most appropriate.
![]()
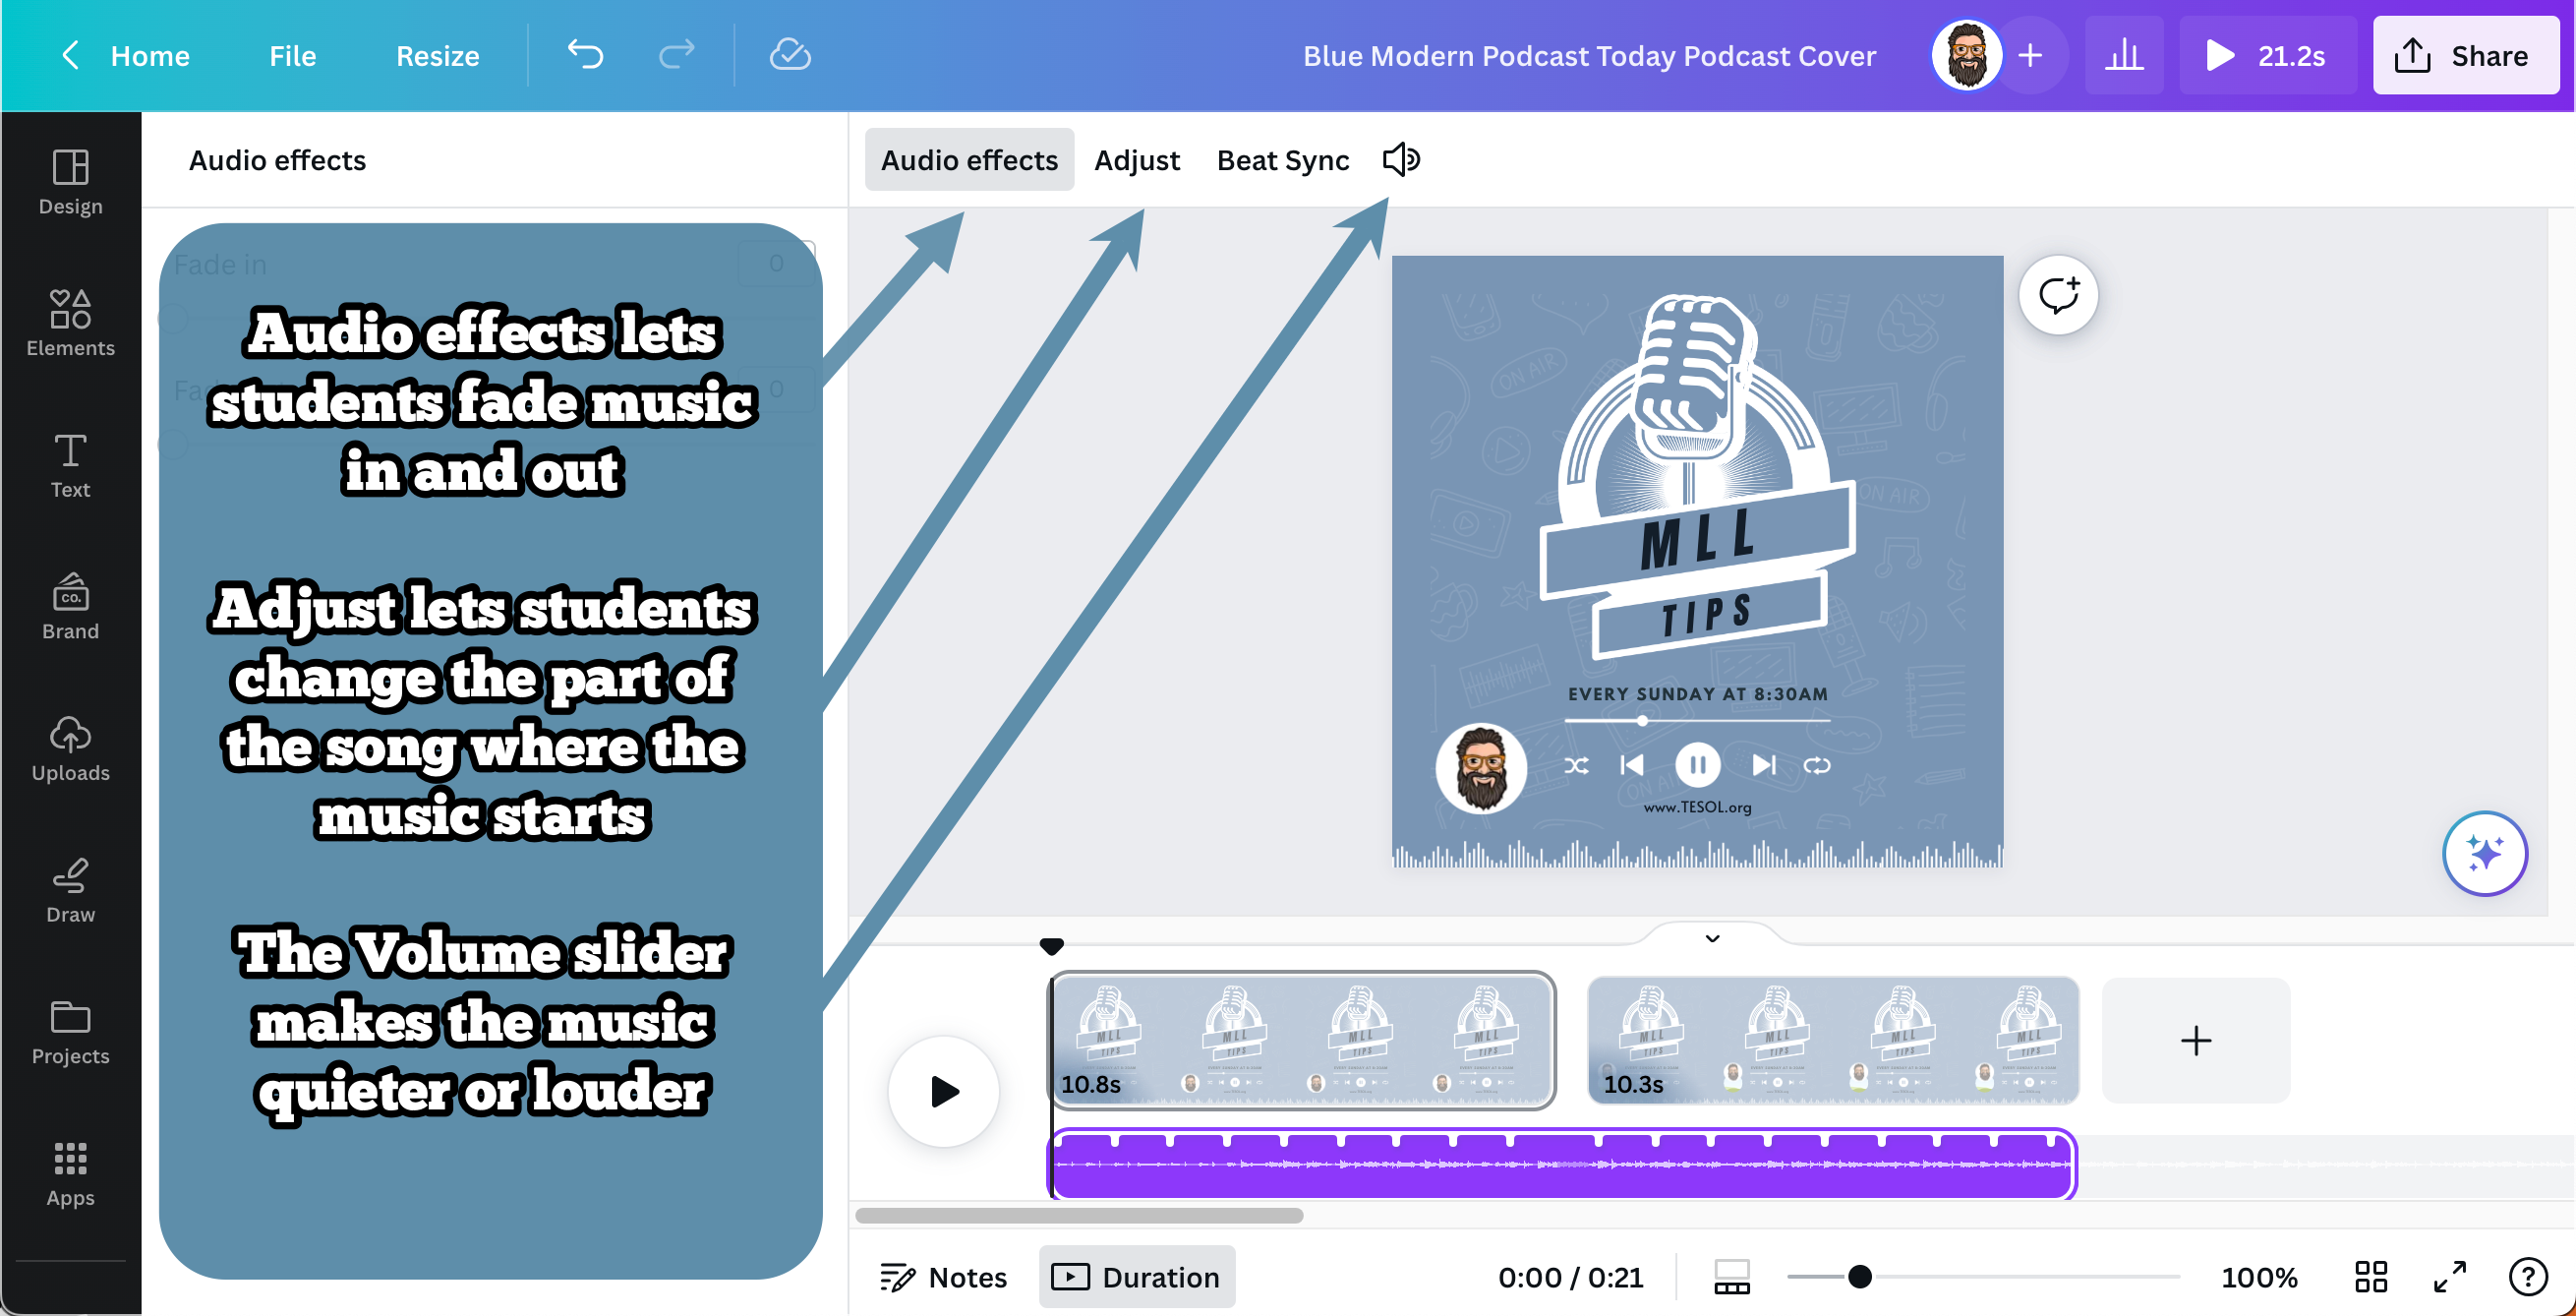
- Fine Tuning: To put the cherry on top, students may like to play with the audio. When they click on any of the audio sources in the editing bar, they’ll see options to fade music in and out, select where songs start and end, and, very importantly, set how loud the volume of the music is.
Step 5: Finalizing and Sharing
- Previewing the Project: Before finalizing, students have the opportunity to preview their project using the “Play” button, allowing for any necessary refinements.
- Sharing the Creation: When students are done, they can click on the “Play” button near the top right to check the final results, or if they’re confident they’re ready, they can go straight to the “Share” button. There are lots of options here, but the easiest is to have them click the “View only” link to share to your LMS or to email you directly.
Conclusion
Integrating podcast creation in your teaching methodology not only nurtures creativity but also fosters a variety of skills, including structured storytelling and technical know-how. Utilize this guide to facilitate a smooth and enjoyable podcasting experience for your students using Canva. Happy podcasting!

About the author
Brent Warner is a professor of ESL at Irvine Valley College in California, and an educational technology enthusiast. He is co-host of the DIESOL podcast, the only podcast with a specific focus on EdTech in ESL. He frequently presents on the crossroads of technology and language learning, focusing on student engagement and developing learner autonomy. Brent likes his coffee black and his oranges orange. He can be found on LinkedIn at @BrentGWarner.